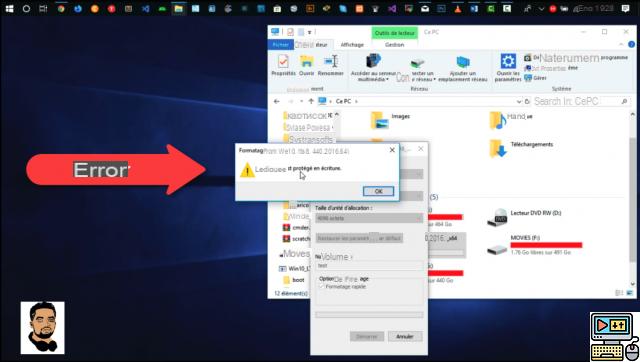
Windows tells you that your USB drive is write-protected? You think you have already tried everything, but nothing works. For you, it's over: your USB key seems dead. Fortunately, you probably haven't tried all the solutions yet to bring your USB drive back to the world of the living!
“Write-protected” USB key: a few points to check before starting
Before embarking on more and more complex methods of recovering your data or more modestly hardware, it is still worth checking a few simple points that can cause this error message:
- Check that the file you are trying to transfer is not itself read/write protected: if so, right click on it and uncheck the “read only” attribute
- Check that there is space left on your key. You will not be able to copy, unzip an archive and open certain files and launch certain programs if your key is full to bursting: try deleting one or two files.
- Check, if there is on your key, the physical button which protects the key in writing. This is not present on all the keys on sale on the market, but when it is, it is often a source of confusion. So try again by changing the position of it.
- If you haven't already, scan your key for viruses.
Now that you are sure that the problem is not a minor configuration issue, you can opt for a more robust method. One is using the command line utility Diskpart, and the other a modification of the system registry keys, via Regedit.
The system registry method
- Press Windows + R keys
- type Regedit then Enter
- Navigate in the tree structure to:
HKEY_LOCAL_MACHINESystemCurrentControlSetControlStorageDevicePolicies
- Change the value of WriteProtect of 1 0 to
- Restart the computer
If WriteProtect doesn't exist, or it doesn't solve anything, that's not the problem. Try the second method.
The DiskPart Method
- Press Windows + R keys
- type cmd then Enter
- In the command prompt type diskpart then Enter
- type list disk
- You should normally see your USB key in the list, which you will recognize by its capacity. If not, try plugging it back in and restarting diskpart. If you get stuck at this step, the problem your key is experiencing may unfortunately not be repairable.
- Select the “disk” corresponding to your USB key with the command select disk n (n is your disk number)
- type attributes clear disk readonly
- type attributes disk to check
Everything about read-only should be “No”. If that didn't work, and the disk is still write-protected, continue with the following steps. Your disk will then be formatted and your data deleted. A method to be used only as a last resort…
- type chub
- type create partition primary
- type format fs = ntfs quick
- type assign
- type exit
- To read also: How to easily share your files between Windows, Mac, and Linux?
There you go, the content of your key can again be modified to your liking! If you found other methods to unlock your write-protected key, please let us know in the comments. Be careful though: USB keys are among the favorite tools of hackers. Beware of the ones you find!
The editorial advises you:
- Windows 10: how to disable Cortana to stop being tracked
- How to install a Linux virtual machine in Windows 10
- Word: how to put a single page in landscape mode


