Transfer movies to iPad using iTunes
Let's start with the standard procedure for transfer movies to iPad, the one that provides for the conversion of files into a format "digested" by the Apple tablet and the transfer of the latter via iTunes.
Install iTunes
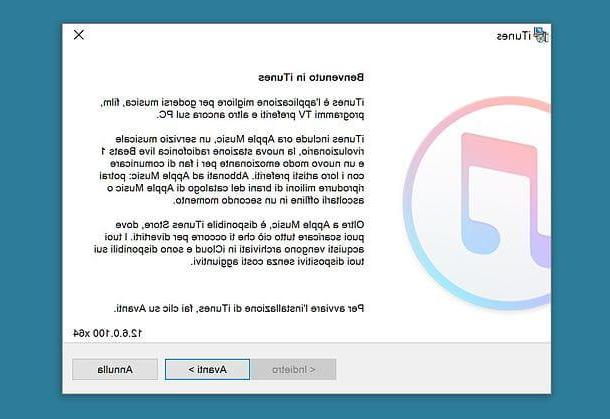
As already mentioned above, iTunes is available as a free download for Windows systems, while it is already installed "as standard" on all Macs. If you have a Windows PC and have not yet installed iTunes on it, connect to the Apple website and click on the button Download 64 bit or button Download 32 bit to download the program in 64 or 32 bit version (depending on the type of operating system you use on your computer).
When the download is complete, open the iTunes installation package (eg. iTunes64Setup.exe) and complete the setup by first clicking on NEXT and then Install, Yes, Yes e end. When connecting the iPad to the computer for the first time, remember to authorize communication between the two devices by clicking on the button Continue that appears on the Windows or macOS desktop and pressing the button Authorize which, instead, appears on the iPad screen. You may also be asked to type the Unlock PIN of the tablet.
Converting movies to transfer to iPad
Once iTunes is installed on your computer, you can move on to converting videos to copy to iPad. To do this, I suggest you turn to HandBrake: a free and open source video converter compatible with both Windows and macOS.
I recommend HandBrake because, in addition to being free and extremely simple to use, it includes preset profiles that allow you to obtain videos that are 100% optimized for Apple devices, including the iPad. If you want to download it to your computer, connect to its official website and click on the button Download HandBrake.
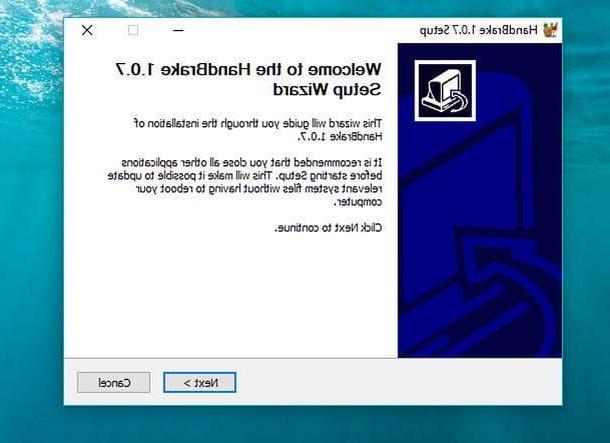
To download completed, a PC Windows, open the HandBrake installation package (HandBrake-xx-x86_64-Win_GUI.exe) and, in the window that opens, complete the setup by clicking on the buttons in sequence Yes, Next, I Agree, install e Finish.
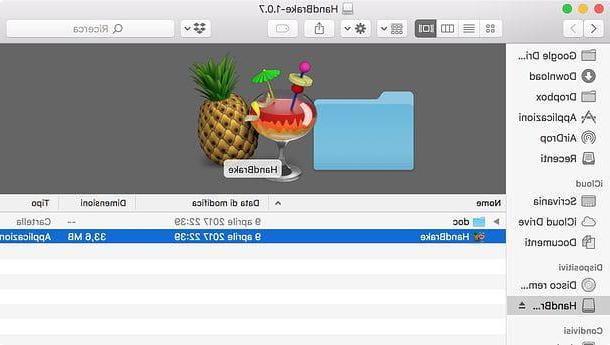
I use a Mac? In this case, installing HandBrake is even easier! All you have to do is open the dmg package that contains the program and drag the icon of the latter into the folder Applications of macOS. To start HandBrake for the first time, right click on its icon and select the item apri from the menu that appears: this is to bypass macOS restrictions on applications from non-certified developers and must be performed only at the first start.
Now you can convert your iPad movies. Then start HandBrake and, if you are using a Windows PC, click on the button Fillet located in the left sidebar to choose the video to convert. If you are using a Mac, start the program and the window for choosing the video to convert will automatically open.
After choosing the video to convert, move to the right sidebar (if you don't see it, go to the menu Presets> Show presets panel HandBrake or click on the button Toggle presets located at the top right), expand the menu Devices found in the latter and choose the conversion profile that best suits your iPad model.
- Apple 1080p60 Surround - create videos in Full HD resolution with a framerate of 60 FPS. This file format is compatible with iPad Air and later, iPad Pro and later, and iPad Mini 2 and later.
- Apple 1080p30 Surround - create videos in Full HD resolution with a framerate of 30 FPS. This file format is compatible with iPad Air and later, iPad Pro and later, 3rd generation iPad and later, and iPad Mini and later.
- Apple 720p30 Surround - create videos in HD resolution with a framerate of 30 FPS. This file format is compatible with all iPad models.
- Apple 540p30 Surround - create videos in SD resolution with a framerate of 30 FPS. This file format is compatible with all iPad models.
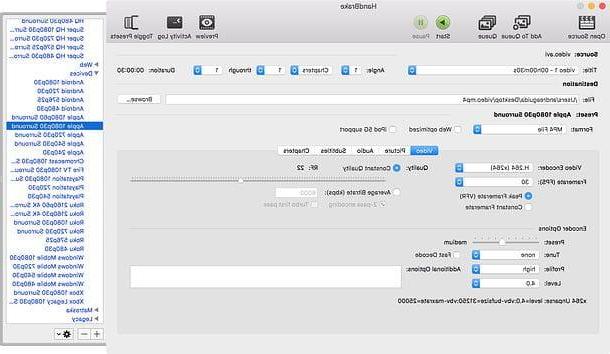
Once you have selected the profile that best suits your device (and the video you need to convert), click the button KATEGORIEN which is located in correspondence of the field Destination, choose the folder where you want to save the converted video, assign a name to the latter by typing it in the appropriate text field and start converting the video by first clicking on the button Save and then Start encode o Home (up).
The conversion process will go on for a few minutes. The actual length will depend on the length of the movie to be converted and the power of the computer being used.
Copy movies to iPad
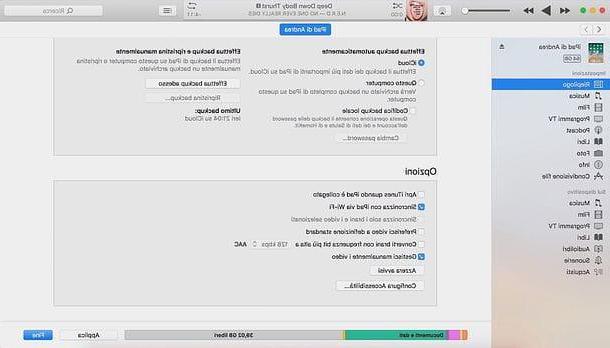
You now have movies ready to be transferred and viewed on iPad (via the application Video present "standard" on iOS). To transfer videos from computer to tablet, connect the two devices together using the cable lightning supplied, then open iTunes (if it has not already opened by itself) and click on the icon tablet which should have appeared in the upper left.
At this point, select the voice Riepilogo from the left sidebar, scroll the screen up and down, put the check mark next to the item Manually manage videos and click on the button Apply located at the bottom right: in this way, you can freely manage the videos to be uploaded to iPad without having to synchronize the video library of the computer with the Apple tablet.
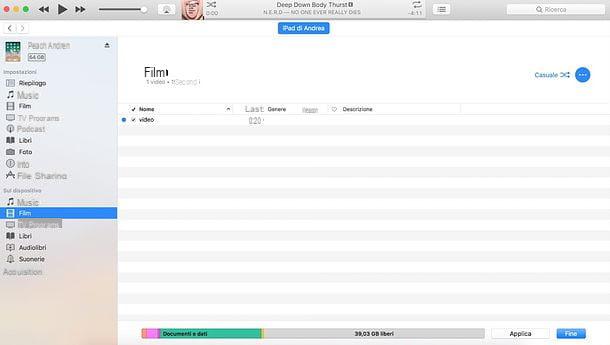
You're finally ready for action! Then select the icon Videos found under the heading On the device in the iTunes sidebar, grab the movies you previously converted with HandBrake (they should be files in MP4) and drag them into the Apple multimedia program window.
Within a few seconds, the videos will be copied to the tablet memory and then be visible in the application Video iOS (which you can easily find on the iPad home screen).
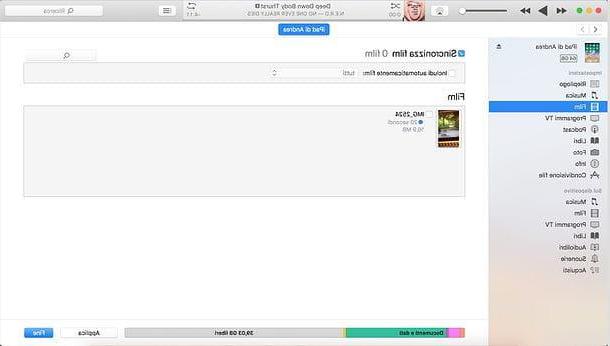
If you want, you can too sync iTunes video library on computer with iPad Videos app: in this way, all the videos present in iTunes on the computer (or part of them) will be automatically copied to the iPad when you connect the two devices and the changes made on one device will be applied automatically on the other (therefore, for example, if you delete a video from your iTunes library, it will also be deleted from the iPad Video app).
To enable video synchronization between your computer and iPad, select the icon Videos found under the heading Settings in the iTunes sidebar, put the check mark next to the item Synchronize movies (above) and choose what to do.
If you want to synchronize with the iPad all the videos in the iTunes video library (to which you can add videos by simply selecting the item Videos from the drop-down menu located at the top left and dragging the files into the program window), put the check mark next to the item Automatically include movies, select the voice all from the adjacent drop-down menu and click on the button Apply / Synchronize which is located at the bottom right.
If, on the other hand, you want to synchronize only some videos while leaving the others on your computer, put the check mark next to them miniature and click on the button Apply / Synchronize which is located at the bottom right.
In case of second thoughts, you can delete the videos uploaded to iPad directly from the Video app or using iTunes, by selecting the names of the files that no longer interest you and pressing the button cancel (o backspace, if you have a Mac) on your computer keyboard.
Please note: if you want, you can copy movies (and any other files) to iPad wirelessly as well. All you have to do is to temporarily connect the tablet to the computer via Lightning cable, click on thedevice icon present at the top left of the main iTunes window, select the item Riepilogo from the left sidebar, put the check mark on the option Sync with iPad via Wi-Fi and click on the button end located at the bottom right. For wireless data synchronization to be successful, iPad and computer must be connected to the same Wi-Fi network.
Transfer movies from the iTunes Store
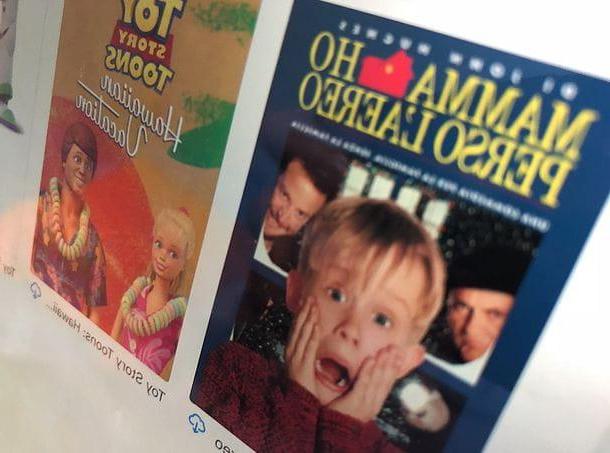
You bought a movie from iTunes Store and now would you like to transfer it to your iPad? No problem, you can open the app Video present on the device and, if this is associated with the Apple ID with which you made the purchase, download the film of your interest by simply pressing the icon of the nuvola present under its poster.
If your iPad isn't linked to an Apple ID yet, open the menu Settings (the gear icon located on the home screen) and presses on the item Log in on iPad.
Transfer movies to iPad with third party solutions
Don't feel like wasting time converting your videos to an iPad-specific format? So, as I already mentioned at the opening of this tutorial, you can install a third party video player and use that to copy and play the movies on the iPad: by doing so, you will be able to view on the tablet even the files that are not readable in the iOS Video app, such as AVI or MKV files downloaded from the Internet.
Among the many video players available on the App Store, I would like to recommend VLC, which is completely free, supports all major video and audio file formats (except videos with AC3 audio, for licensing reasons) and allows the transfer of files to iPad via cable or wirelessly, even without using iTunes.
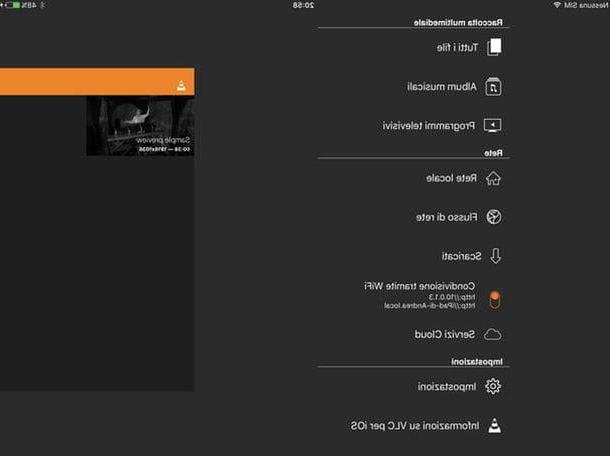
Once you have downloaded VLC from the App Store (just search for the name of the app and press the button Get located next to its icon in the search results), if you want to transfer your videos to the iPad wirelessly without going through iTunes, start the application, press the traffic cone (top left) and move up ON the function lever Sharing via Wi-Fi. An address will appear, for example http: //iPad-di-Andrea.local.
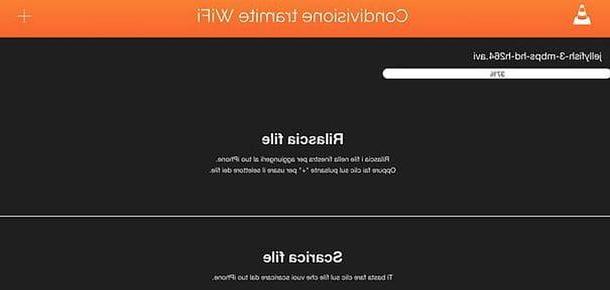
At this point, make sure that the computer is connected to the same Wi-Fi network as the iPad, open the browser you usually use to surf the Internet (eg. Chrome o Safari) and connected to the address that VLC provided you just now. A web panel will open, through which you can copy your movies to iPad without going through iTunes.
Then drag the files you want to copy to your tablet into the browser window (in the Release file) and wait a few seconds for the operation to be successful. At the end, you can play your movies in VLC by simply pressing on them miniature present in the main screen of the app.
If you want, you can copy the movies in VLC for iPad via the function as well File sharing of iTunes. Then connect the tablet to the computer using the cable lightning supplied (not necessary if you have activated the function Sync with iPad via Wi-Fi in iTunes), click ondevice icon that appears at the top left and selects the item File sharing from the sidebar.
At this point, click on the icon of VLC present in the box Applications, drag the movies you want to transfer to the iPad into the adjacent box (VLC documents) and, within seconds, your videos will be available in the app.
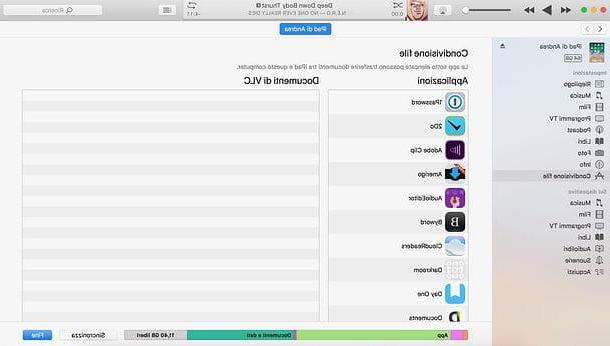
In case of second thoughts, you can delete the videos copied in VLC using the appropriate function of the app or by selecting them in the menu File sharing iTunes and pressing the cancel (o backspace, if you have a Mac) of the keyboard.
If you want to copy videos with AC3 audio to the iPad without having to convert them first, you have to rely on paid players, such as the excellent Infuse (0,99 euros / month or 49,99 euros one-off), which also offers wireless data transfer functions via browser and via iTunes.
How to Transfer Movies to iPad


