 There is nothing worse than finding your printer out of ink within days of replacing the cartridge or toner! If the printer is also used by other people, it is highly likely that someone has used it to make a large number of prints without warning you, running out of ink in a short time. To understand how many documents have been printed without our consent, in this guide we will show you how to view Windows Printer History, so as to keep track of the use of the printer and to be able to immediately check how many sheets and how much ink was used during our absence. For the guide we will show you both the tools available on the operating system and a program that will allow you to trace all printed documents.
How to view Windows Printer History
To save information about documents sent to the printer, we will need to adjust some settings on Windows. If we want to act in an even simpler and more practical way, we will also show you how to use a third-party program to keep all printed documents (very useful in the case of a shared printer on the network or not directly accessible from the computer in use).Enable Print History on Windows
In order to obtain a history of the files printed on Windows, we will have to activate the function that allows you to locally save the files sent to the printer. Since we will keep a copy of every document or file printed, we recommend that you clean up the indicated folder often, to avoid filling up the available space on your hard drive or SSD.To enable the saving of files sent to the printer on Windows, we open the Start menu at the bottom left, search for and open the Control Panel, then let's go to Hardware and Sound -> Devices and Printers. We identify the printer in our possession or that we intend to use for future prints, right-click on it, select the item Printer properties and, in the new window that will appear, let's go to the tab Advanced, so you can activate your voice Keep documents printed.
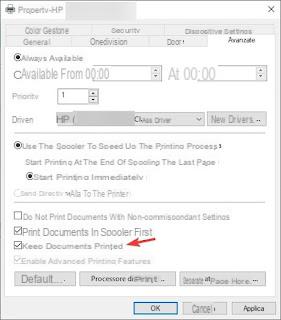
To confirm the change, click on Apply and finally on OK. From now on we will have the history of the printer files visible directly from the preview window (spooler or print queue).
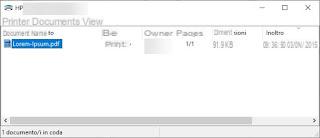
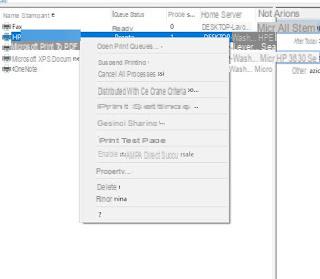
To view this window with the history without necessarily having to print a sheet, simply open the path Control Panel -> Hardware and Sound -> Devices and Printers as seen above, right-click on the printer to be checked and finally click on View printing in progress. Alternatively, open the Start menu at the bottom left, search for and open the program Print management, let's go to the path Custom filters -> All printers then right-click on the printer to be checked to be able to select the item Open print queue.
If we don't want to open too many windows, we can also check the print history by opening File Explorer o Computer resources and visiting the path C: WindowsSystem32spoolPRINTERS, where we will find all the files sent to the printer in an unreadable format (SHD and SPL files, which are usually tied in pairs for each document sent to the printer).
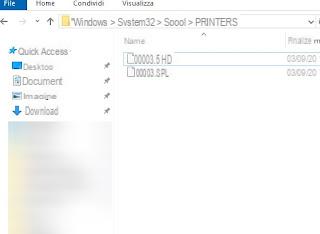
Whatever the method used, we will be able to find out how many documents have been sent to the printer, so as to immediately realize the amount of ink consumed (especially with longer prints) and also obtain the date and time of sending. Unfortunately, with this method only the instructions and settings sent to the printer will be stored, so we will only be able to obtain the name and extension of the file sent to print: therefore we will not be able to use this method to recover a document printed in the past of which we do not have the original file.
Enable history with PaperCut Print Logger
If we wish to use a third party program to monitor the processes of all printers connected to the computer, we recommend that you download the free PaperCut Print Logger program.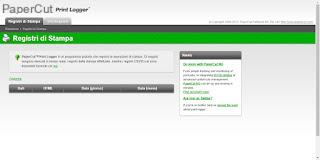
Once installed on our computer, it will immediately begin to monitor all the prints made, so as to be able to retrieve valuable information on each print process carried out without our consent.
To view the print history generated by the program, open the Start menu at the bottom left, look for the PaperCut Print Logger folder, expand it and finally click on View print data. A local web page will open (it works even without the Internet) with all the print jobs started by your computer in the foreground, with detailed information on the date and time of printing, the user who started the print, the number of pages, the number of copies, the printer used and the name of the document from which the printing started.
Conclusions
As we have seen in the previous lines of this guide, viewing the print history on Windows is quite simple, but we will have to act in advance to obtain information on subsequent print processes (therefore we will not be able to view the documents printed before activation history on Windows or the installation of the PaperCut Print Logger program). If, on the other hand, we also want to reprint documents that have already been printed, we will have to refer to the print history included within each printer (usually limited to a certain number of documents and reset each time the device is turned off).If we want to check the ink or toner level on our printer, we invite you to read our guide on how Check the ink level of the printer.
To add a new printout on Windows instead, just read the steps described in our article on how Add a printer on Windows.
Do we want to print PDFs quickly and easily? To do this we can rely on virtual PDF printers, such as those described in the guide to Best virtual printers to create pdf from documents and web pages, free for Windows.
How to view the Windows Printer History


