 @Lesnums), Samuel Boivin
Posted on 06/03/18 at 14h00 Share:
Pixel scatter, pixel explosion or even disintegration effect: call it what you want, it's a very popular effect on the Internet to give or reinforce movement to a photo. We will see here how to simply reproduce this effect, step by step.
Prerequisites
Simply ? Yes, because if this effect, with a little control, can give a very clean and impressive rendering, it is nevertheless relatively easy to create with Photoshop, at least from a technical point of view. Your creativity will be your only limit.
To do this, in addition to a good dose of imagination, you will need to master certain aspects of Photoshop, namely clipping, the use of layer masks and the management of brushes. If this is not the case, don't worry, everything will be explained to you in the step by step below.
As the most difficult part is to find the right photo, in order to save some time and test this effect as soon as possible, you can download the following photo in full definition.
Step by step
Step 1
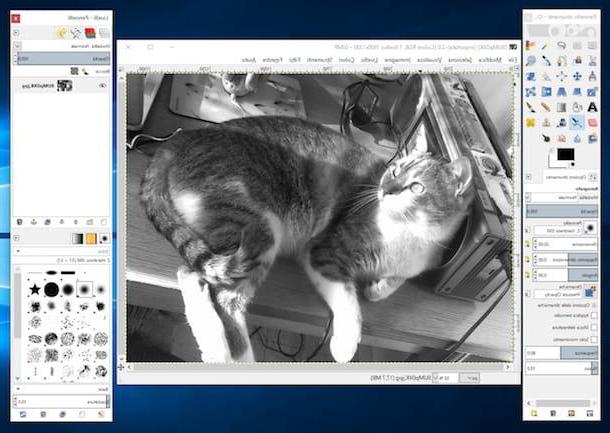
This is the simplest and dumbest step: open the photo provided as an example or the one of your choice in the Adobe Photoshop application. For the effect to work, you need a photo with movement or, as here, an element or look that captivates the eye.
Step 2
Now that your photo is open in Photoshop, you will have to start by duplicating it twice (Ctrl-J or Cmd-J) and renaming one copy “Subject” and the other “Explosion”.
Step 3
Then deactivate the source layer, because it will only serve you as a backup in case you do something wrong on one of the other layers. Also deactivate the “Explosion” layer which will not be used at first.
Step 4
Now select the “Subject” layer and start clipping it – here, the cat. Regarding the technique to outline your subject, there are several on Photoshop and everyone has their preference. However, it is strongly recommended to use a fusion mask in order to make certain areas of the photo appear or disappear and, above all, without the modifications being permanent.
To do this, you can use the Quick Selection Tool (W) and select the outlines of your subject quite precisely, then, using the Refine Edge dialog box, you will be able to redefine a more precise outline. Before clicking OK, from the Output menu, select Layer Mask.
Your subject is now cropped. You can modify or reveal other areas of the image by painting the area in the layer mask white, or erase another area by painting black, still in the layer mask.
Step 5
You have probably noticed: your subject is certainly clipped, but you no longer have a background image. To remedy this, you can choose to create a “background” layer with a color to your liking. In our example, we're creating a solid green layer that uses the background color of the original photo.
You can also duplicate the source photo, recover the selection via the blend mask of the “Subject” layer, and via the Select > Modify selection > Dilate menu, dilate it by 200 px for example. Then, from the Edit menu, choose Fill, make sure Fill Mode is set to Content Aware, and click OK.
The selected area is normally filled with a mix of nearby content. Unfortunately, if this technique is practical, it does not always provide a satisfactory result according to the photos.
Step 6
Select and then activate the “Explosion” layer that you will place under the “Subject” layer. Then go to the Filters menu and select Liquify: a new window will open.
In this one, using the brush that you will have adjusted to the appropriate size, you will stretch the texture of your subject while trying to keep as much as possible a correct texture rendering. With the example photo, you have to make the hair look like hair, not pixel mush.
Once this step is complete, click OK, and for the sake of the final rendering, using the clone stamp, erase the duplication of the cat's eye, replacing it with hair. His eye not being part of the pixel explosion zone, there is no reason for eye pixels to be found afterwards. Finally create a totally black layer mask to hide everything first.
Step 7
Now go to the layer mask of the “Subject” layer and select the Brush Tool (B) which you set to black. If you haven't done so yet, load the brushes provided as examples or others more to your liking, which you can find in three clicks on many sites.
You will have to erase the outline of the subject, via the fusion mask, so as to create a first effect of disintegration. Depending on the desired effect, you can use a brush in the shape of swirls of smoke, dust, or like here, an explosion of glass.
For much finer work, use the Shape parameter which you can activate via the F5 key. In this window, you will be able to adjust a number of parameters, starting with the size of the brush, its orientation, its dynamics, its spacing, but also couple two brush shapes.
Before you find a satisfactory rendering for your disintegration effect, you will surely try it several times. This is where the use of the fusion mask takes on its full meaning, since by setting your brush to white you will be able to bring back areas where you have stripped the subject too much in texture and vice versa. No change is final.
Above, the cat's eyes have been reverted to white in the layer mask in order to recover them.
Step 8
Now we need to create the pixel dispersion effect using the blend mask of the “Explosion” layer. Using the brush set to white and with a shape corresponding to the desired effect, bring out areas of the stretched texture just now.
There is no miracle solution to obtain an adequate effect; you will have to arm yourself with a good dose of patience and imagination. Try to visualize as much as possible how the elements are projected during an explosion and get inspired by it. Do not hesitate to test several solutions.
For the example above, we first used a brush with a glass explosion shape that was angled in the right direction to match the vanishing point and sized to match the desired distance. After a first press, the size was reduced a little to increase the density of matter, then again, and so on, until obtaining a satisfactory mass of matter at the point of explosion, then less and less. less to the vanishing point.
The effect being interesting, but not completely satisfactory, it is the combination of two layers which gives this rendering: the one with the brush in the shape of an explosion of glass and another with the same technique, but matched with a brush in form of dust puff to give the most pleasant result. Feel free to experiment as much as necessary and combine two effects on different layers until you find what works best for you.
Step 9
Your effect is created technically, however the rendering is far from impressive. It is also up to you to let your creativity speak. After thinking and seeing the effect created, it becomes obvious that the green background does not highlight the explosion of the subject. You can, for example, change your “Background” layer to white or black, or any other background that seems consistent to you.
To enhance the effect, but also soften the remnants of the original green background, convert your creation to black and white while using the layer mask to erase the effect on the cat's eyes to leave them in color and make your eyes stand out a little more. Play around with Brightness/Contrast and Hue/Saturation masks, create a vignetting effect or whatever, but let your creativity be your guide. It's just a matter of taste!
Step 10
Before definitively saving your creation and displaying it proudly, do not hesitate to refine a few small details that will make the difference, to rework the dispersion of the pixels, etc. If everything looks perfect, you're done!
Conclusion
Now all you have to do is find other photos to apply this effect to and practice. Obviously, this is not the one and only way to proceed. Over time, you will learn other ways of doing things to further refine the desired effect. But it is above all a technically simple enough way to understand how the effect is created and works. Whether it's an explosion of pixels, wisps of smoke, dust or flames, the starting point will always be the same.


